It’s always been a dream of mine to build my own computer. I don’t know why, I think it’s my inner nerd. I was always the kid that made huge Lego spaceships. Maybe I have an urge to make things.
Why I decided to build a mini PC
When I returned to the UK after spending 10 years in India, the first purchase I made was a large HP all-in-one machine. “Why did you have to go and buy that?” My wife demanded. “You already have a laptop.”
There was no right answer there. I just wanted a big computer. I’ll let your Freudian minds make of that what you will.
Within a week of buying this AIO, I could barely get any airtime on it. My wife had discovered that having a large screen somehow makes you more productive and is just nicer to use than a laptop with a little 14 inch screen.
So if the desktop computer now belonged to her, I had that itch to scratch. It was time to build my own PC.
I’m not a gaming addict or anything, I’m too married for that. Marriage brings responsibilities which is incompatible with staring at a screen fragging little Bobby, whose only responsibility in life is to do his homework and take his empty mugs down from his room. I was once a Bobby.
So that ruled out building a gaming rig. I couldn’t justify marathon sessions of Fortnite when there are bathrooms to be scrubbed and rooms to be vacuumed.
I settled on building a mini PC that I could use as a HTPC, but also have it double up as a temporary workstation. Kind of like living the dream of working from your couch but without a laptop perched on your lap.
I built what I thought was a pretty decent machine. Having used it for the last six months, I’m thinking I’d change a few things.
My custom built mini PC
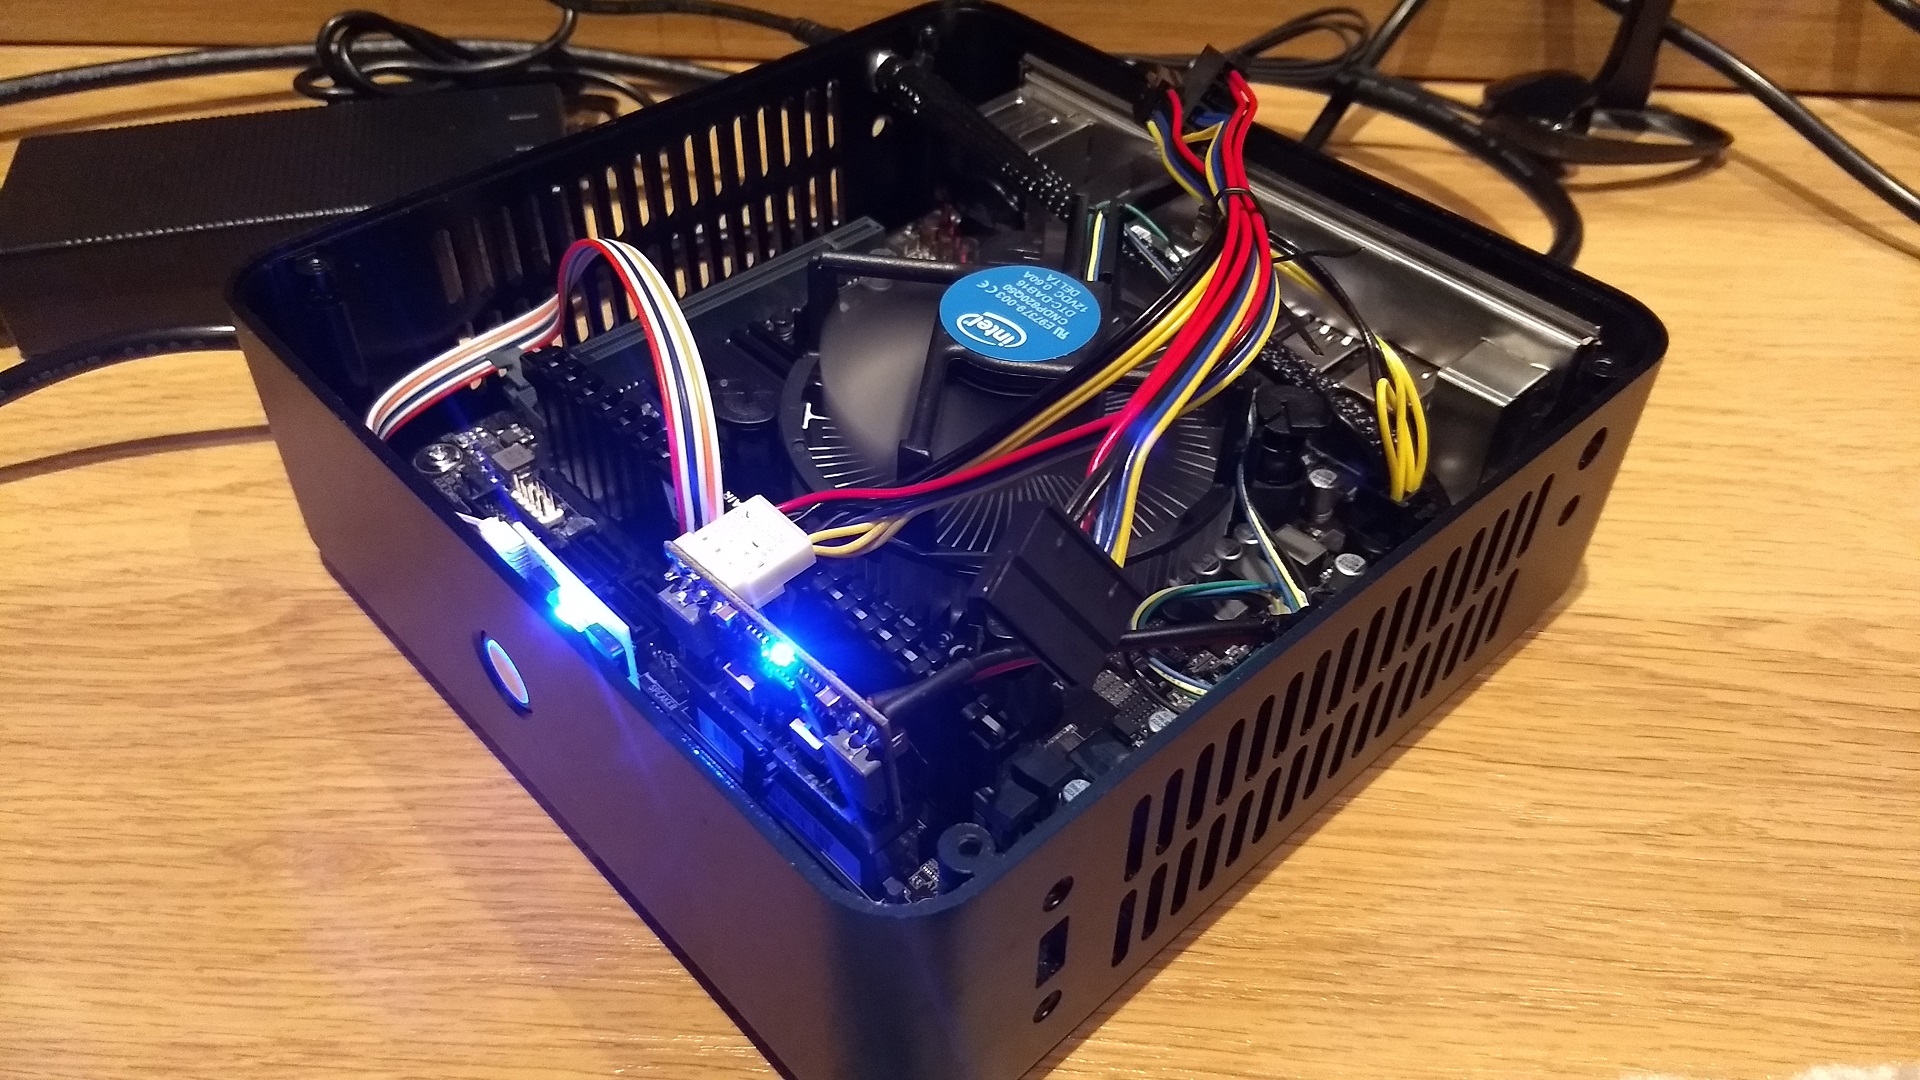
Here’s the final build, minus the lid. Please ignore the cable management, I haven’t learned that yet 🙂

The specs
- Realan H60 Mini PC case – AliExpress
- 120W pico PSU
- Gigabyte 360N WIFI Mini ITX motherboard – https://amzn.to/2IviLKt
- Intel Pentium G5400 3.7 GHz – https://amzn.to/2ILCEMM
- 8GB Corsair Vengeance DDR4 – https://amzn.to/2PlmN8R
- 256GB ADATA XPG SX6000 M.2 SSD – https://amzn.to/2XuEdCE
- Noctua NH-L9-i Low Profile CPU cooler – https://amzn.to/2ILZzY6
- Logitech K400+ wireless keyboard – https://amzn.to/2DnoL3G
- Windows 10 Home – https://amzn.to/2UqKptD
In total, the build cost me £350. I did save a boatload of money by buying a reclaimed Windows 10 license key from Amazon instead of a whole new license from Microsoft. It’s a legal workaround 🙂
I could probably have bought a new PC for less than this, but I really wanted something that was a small form factor. There are a number of ready-made Mini PCs and even NUCs from brand names like Asus, HP and Intel, but they were either out of my budget or had no future upgrade options as the processor is soldered to the motherboard.
The Mini ITX Case
I searched high and low for the perfect case for a mini PC. I trawled through every Amazon listing and leaned heavily towards the Silverstone Mini ITX cases. However, after watching this video by Jay Mattison of Tek Everything, I knew I wanted my mini PC to have a form factor like the Apple Mini.
(Buying an Apple Mini was never even a consideration because, well, it’s an Apple).
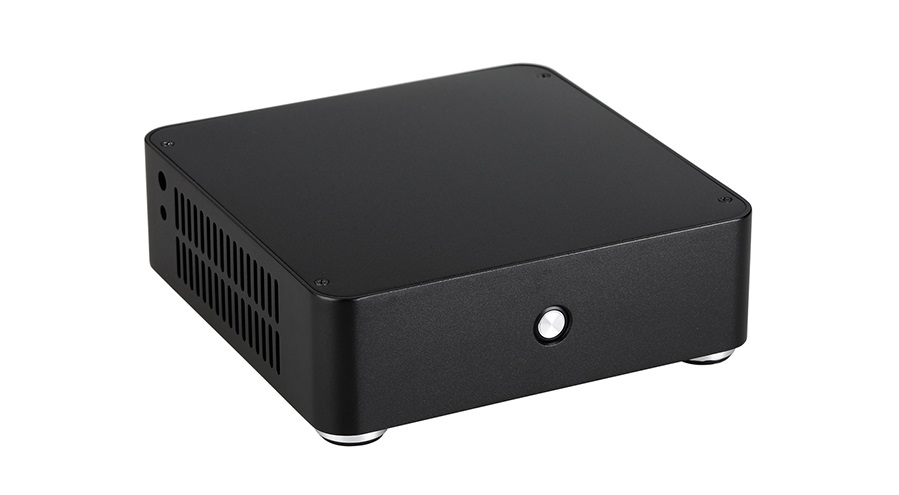
From there, I started searching through AliExpress and found that the Realan cases were exactly what I was looking for.
What’s more, the Realan cases came with pico PSUs. These are a bit like the power supplies you use for laptops. To keep the case small, the power cord plugs into a big transformer that’s outside the case. The power supply inside the case is then a small electrical circuit board attached to the plug that plugs into the motherboard.

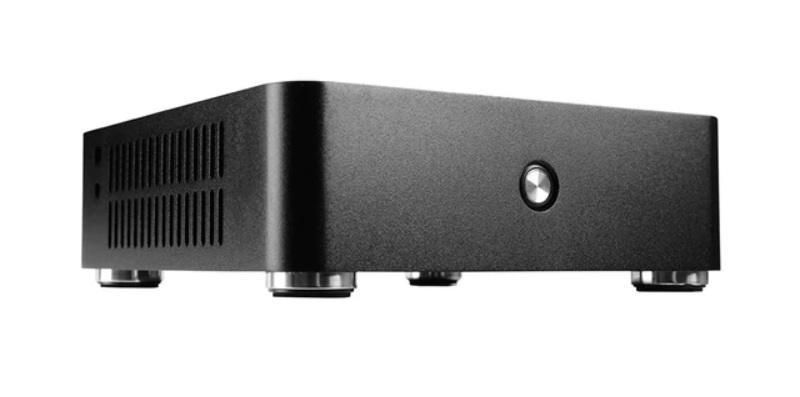
I opted for the black case, but they have a silver case as well. Personally, I think it looks really nice and it sits well in the entertainment cabinet.

The biggest drawback is the placement of the power plug. It’s located on the side of the case so it looks a bit strange to have the random cable sticking out the side. I really don’t know why they couldn’t have the power port on the back.
The PSU
The Realan case came with a 150 watt pico power supply, so I didn’t have to purchase a separate one. For a lot of these really small mini ITX cases, you need to use a pico power supply.

The Processor
The next thing I looked for was the right processor. The Pentium G5400 seemed to tick all the boxes. As mentioned above, I wasn’t building a gaming machine so I didn’t need something too powerful. But then, I didn’t want something that was so anemic that it would struggle to keep multiple browser tabs open with a HD video playing in the background.
The AMD Athlon processor was cheaper, but motherboards for AMD processors were much more expensive, which was weird. Finally, the Celeron G4900 was only slightly cheaper than the Pentium G5400, so there were no cost savings there.
I’ve seen the Pentium G5400 described as a beast of a processor. This seems odd at first since the Core i3 is like an entry-level processor, but when you run some comparison tests, you see what that person meant.

The G5400 is at almost par with the Core i3-7100 (and the other i3 7th generation series) at half the price. Considering the 7th gen i3’s were released just a year earlier, they are still good processors. Even against the 8th generation Core i3-8100, the G5400 is not too far behind, given that it’s less than half the price.
The motherboard
The first task with choosing a motherboard was to learn all the variations that you can get with a motherboard. I learned early on that if I was going to use a Pentium G5400, the motherboard had to have a socket called LGA1151. That’s where the processor goes. Every few years the socket type changes as the processors are updated.
This is why it always makes sense to choose your processor first, because that narrows down your motherboard options. AMD processors need a different socket type to Intel processors.
The next variable to figure out is how many features you want your motherboard to have. Next to the motherboard models, I started seeing numbers like H310, B360, H370 and Z370.
The model numbers refer to how advanced the motherboard is, and usually pertains to how much customization you can do, for example, overclocking the processor.

Essentially the H310s are the budget option with support for fewer USB and SATA connections. The H370 is the most advanced with support for loads of USB and SATA connections, while the Z370 is like the H370, but is more for the enthusiast who likes to tinker with settings and overclock everything.
Which one should you choose?
I chose the Gigabyte B360N WIFI motherboard because it had a wifi adapter built into it. I didn’t want to buy a separate wifi adapter. There’s no other reason apart from that 🙂 If you’re happy to buy a separate wifi adapter, then a H310 motherboard is probably going to be more than suitable for your Mini PC or HTPC.

The Gigabyte B360N WiFi came with a wifi antenna that you can screw in. I didn’t know that it would come with that accessory and I thought I might have to buy it separately.
The RAM
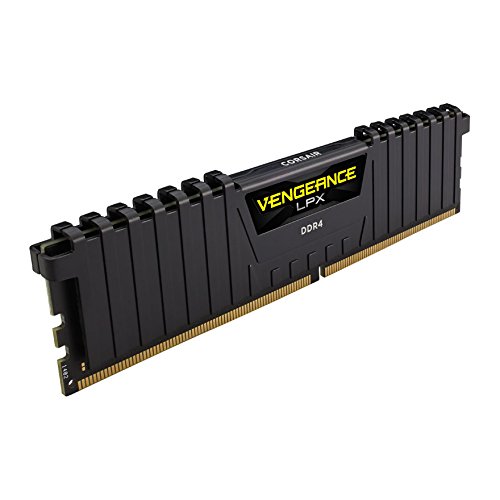
This was an easy one. I wanted 8GB of DDR4 RAM and I wanted to buy it as a single stick. That way, if I wanted to upgrade to 16GB in the future, I just needed to buy another 8GB stick.

I chose the Corsair Vengeance 8GB stick for no other reason than it was affordable and had great reviews. I certainly don’t have any complaints as it’s worked without a problem from the moment I first turned on the computer.
The Storage
I toyed with getting a Crucial 120GB SSD as they cost just £18 from Amazon, but I wasn’t sure if there would be space in the mini ITX case. I went for a slightly more expensive 128GB M.2 SSD from ADATA and I’m absolutely thrilled with the results.

The SX6000 board comes with a thermal pad and DIY heatsink which you need to attach yourself. The M.2 SSDs can run a little hot, so a heatsink is required.
Windows 10 boots in literally seconds.
It takes my TV longer to power on than it does for this mini PC to load Windows to the login screen.
The machine flies, and it’s all down to the M.2 SSD. I can’t imagine ever buying a computer that doesn’t use an M.2 SSD, and when I recently upgraded my laptop, my only requirement was that it had to have an M.2 SSD. That machine also flies.
I also had a bit of luck as I ordered the 128GB version, but they sent me the 256GB version.
The CPU Cooler
To begin with I used the stock cooler that ships with the Intel processor. I guess it did an OK job, but the real problem was that it was about 5mm too high for the case so I couldn’t screw the lid on.

I was left with a mini computer with an ungainly lid that stuck up at a funny angle. I did some research and decided that I needed a low profile CPU fan and all signs pointed to the Noctua NH-L9-i Low Profile CPU cooler. It’s a little more expensive than a regular fan, but the reviews said it’s whisper quiet.

Having replaced the stock Intel cooler for this one, I can say with certainty that this is a whisper quiet fan. You can barely hear it even at high speeds, which makes for a great fan for a HTPC where you don’t want a semi-audible hum over the top of the quieter parts of a movie.

The Keyboard and mouse
Since this was going to be a media centre PC in my living room, I needed a wireless keyboard with trackpad. I considered some cheap Chinese brands to begin with, but ultimately went with the Logitech K400+. It had some decent reviews and I can’t find any fault with it after using it for close to six months.

This entire article has been written using the K400+ keyboard. It’s not as good a typing experience as a good chicklet keyboard, but I don’t think most people are going to be writing 4,000 word articles with it either. I’m just the anomaly.
The operating system
I seriously considered running Ubuntu on this machine, but since my wife was also going to us it, I decided to play it safe and installed Windows 10.
I’m personally a fan of Windows, but I’m not really a power user. I’ve never had a moment where I’ve been like “aaarraaghhh, why do you make this so hard?!” Nor have I had to deal with regular crashes on any Windows version.
Am I the exception to the rule?
The EU generally hates American tech companies. This benefits the consumer when it comes to buying certain software products like Windows or Office.
The EU ruled that companies could redistribute unused or revoked license keys. Say, for example, a company bought a batch of 500 Windows license keys, but only ended up using 450 of them, the remaining 50 could be resold.
If you go to Amazon in the UK and search for Windows 10 license key, you’ll find some shady products that promise you Windows 10 for around £15. I took a punt on one of these and within an hour I received a license key which worked like a charm. I’ve been using it without problems ever since.
The TV
The whole purpose of this mini PC was to build a compact media centre that had the power to play a few casual games and surf the web. When I showed my wife the completed build she asked how I could use it without a monitor, and I told her that she was right, we needed a monitor to be able to use the computer otherwise it was just a big waste of money.
Remember, I was building this system on a budget, so I wasn’t going to splash out on a 60 inch Samsung Super OLED smart TV. Besides, since I was going to connect the computer to the TV, I didn’t need the TV to be ‘smart’ in any way. That was an unnecessary cost.
I found that Tesco sells its refurbished and returned electrical appliances on eBay. I browsed through the listings and found that a 42 inch Sharp Aquos was listed for just £180. Bear in mind that even a non-brand 42 inch TV costs around £300 on Amazon. £180 was a bargain, although it did say that there was some cosmetic markings on the frame.
When the TV arrived, I couldn’t find any markings or cosmetic blemishes on the frame, so they obviously have a far lower tolerance than I do. Once the TV had been connected via a HDMI cable, we were cooking with fire.
The Build
This was the first time I’d built a PC and I followed very carefully what Jay Mattison was doing. The trickiest part was knowing where to plug everything in, although once you’ve figured it out it is fairly straightforward.

To boot from Windows, I downloaded a Windows 10 image from Microsoft onto a SanDisk 32GB USB stick and stuck it into one of the USB ports.
I was apprehensive about whether I could use a wireless keyboard to install Windows for the first time because I wasn’t sure if it would require drivers to be installed first. As it turned out I had nothing to worry about. The Logitech wireless keyboard and trackpad worked immediately after booting and I was able to install a fresh copy of Windows without trouble.
That license key that I bought off Amazon worked like a charm, too! With the M.2 SSD, Windows 10 installed within a few minutes. Windows 10 detected all the hardware without problem and automatically installed the necessary drivers.
Honestly, it couldn’t have gone more smoothly.
What would I change?
If I had to do this all over again, I would do it in one of two ways.
First, I’d get a mini ITX case that was taller than the Realan H60 one I bought. The reason is that I could have saved some money on the Noctua fan and I reckon I could have fitted a couple of 2.5 inch HDDs to use as data storage.
Realan also does a taller version of the H60 called the H80S which it sells on AliExpress. There’s also the Realan Ei-7 which comes with a slot for a DVD drive as well. I’d probably go for that.
Or…I’d go for one of the SilverStone cases that are slightly larger and more expensive, but can accommodate a graphics card as well.

Or…since I do love the diminutive H60 case so much, I’d opt for the Pentium Silver J5005 processor which you can get with the ASRock J5005-ITX motherboard combo. The motherboard and low power processor mean you don’t need a fan and would have enough space to add a couple of 2.5 inch HDDs inside the case.
The downside is that the processor is soldered to the motherboard so you can’t upgrade it, but if it works for the next 3 or 4 years, by the time it comes to upgrading your processor, the newest processors will probably require a different socket type.

Questions?
I think building a mini PC is going to be an addiction. I want to try it out with more processors, different motherboards and definitely with different cases. I’m still motivated to try overclocking yet, since I’m not a gamer.
What about you?
Are you going to have a go at building your own mini PC?
If you’ve got any questions, let me know in the comments below. I’m by no means an expert, but I have geeked out enough on this to kind of know what I’m talking about.
Hi Peter!
I was just googling “build your own mini pc” and saw a familiar name in the search listings! Long time, no see! I hope all’s well with you, considering. I didn’t realise you were back in the UK!
Tom